This guide explains Disney World’s Disability Access Service (DAS) and how ride transfers work for manual and power wheelchair users. You’ll get practical, up-to-date guidance on registering for DAS, navigating the Lightning Lane Multi Pass and virtual queues, attraction transfer policies, and hands-on tips for a smoother, safer park experience from arrival to ride exit.
What the Disability Access Service does and who can use it
The Disability Access Service exists for guests who cannot wait in a standard line for long periods. This service focuses on developmental disabilities like autism. It helps people who find the sensory environment or the physical confinement of a queue impossible to manage. In early 2025, Disney updated the language on their website, removing the word “only” from the description of who can use the service. While the core purpose remains providing a way to wait for attractions outside of the physical line, this language update reflects a slight shift in how eligibility is described.
When you use this service, you receive a return time for a ride based on the current standby wait. If the wait for a ride is forty minutes, your return time will be forty minutes from the time you make the request. You can spend that time anywhere else in the park, such as a quiet area or a restaurant. You can only hold one return time at a time. Once you redeem that time and enter the ride, you can book another. It is important to know that this service does not offer immediate access; you still wait the same amount of time as other guests.
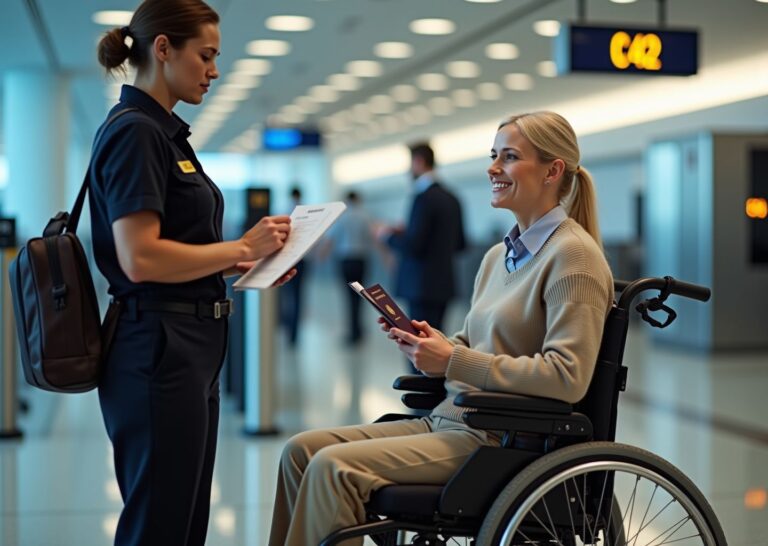
Registration for the service has changed significantly. You can no longer register in person at the theme parks; all registrations must happen through a virtual video call. You can schedule this call as early as sixty days before your visit, and you must complete it at least two days before you arrive. The guest who needs the service must be on the video call. If the guest is under eighteen, a parent or guardian must handle the call. Disney now includes medical professionals in the screening process to help determine eligibility.
During the video call, you will talk to a Cast Member about your specific needs. They do not require a doctor’s note or medical documentation, but you must be prepared to explain why a standard queue is not an option. Focus on the specific behaviors or challenges that occur during a long wait. Disney has a strict policy regarding the information you provide; if they determine that a guest made false statements to obtain the service, that guest will be permanently banned from Walt Disney World and Disneyland, and all tickets will be canceled without a refund.
As of May 2025, a successful registration is valid for up to one year (365 days), a significant extension from previous years. If your park tickets are for a shorter time, the service lasts for the duration of those tickets. You do not need to cancel the service if your plans change; it will expire on its own. To renew the service after it expires, you must complete the virtual video call process again. You can find more details on the official DAS page.
There are several myths about how this service works. Many people think it is a way to skip the line, but it is actually a virtual wait. Another myth is that any disability qualifies a guest for the service. Disney directs guests with mobility issues to use a wheelchair or an electric vehicle, as most queues at Disney World are fully accessible. If your primary challenge is standing or walking, you will likely be denied DAS. Common conditions that are often denied include IBS, neuropathy, and general mobility limitations.
The service is different from other guest assistance options. Rider Switch is for families with children who are too short for certain rides; one adult waits with the child while the rest of the group rides, then they switch. You do not need a disability to use Rider Switch. The paid Lightning Lane Multi Pass (formerly Genie+) allows guests to pay for faster access to many rides. You can use the Disability Access Service and Lightning Lane Multi Pass at the same time to help manage your day.
To register for the first time, follow these steps:
Step one
Log into your Disney account on the official website and make sure all your park tickets are linked.
Step two
Go to the accessibility services page and find the section for the Disability Access Service.
Step three
Click the link to start the live video chat. This service is available daily from 7 AM until 8 PM Eastern Time.
Step four
Wait for a Cast Member to join the call. The wait times can be long during peak travel seasons.
Step five
Complete the interview with the guest who needs the service present on the camera.
Before your registration call, make sure you have everything ready:
- Your Disney account login details
- All members of your travel party linked in your family and friends list
- The guest who needs the service present and ready to talk
- A quiet room with a stable internet connection
- A clear explanation of the specific challenges the guest faces in a standard queue
Disney updated the rules six times in 2025 to ensure the system works for those who need it most. You can read about every new rule added to the service in 2025 to stay current. Always check the official Disney website for the most up to date information before your trip.
How DAS interacts with Lightning Lane and virtual queues
Managing the logistics of a Disney World trip requires understanding how different queue systems interact. The Disability Access Service (DAS) functions alongside the paid Lightning Lane Multi Pass, the Lightning Lane Single Pass, and the free Virtual Queue system. Navigating these overlapping layers is essential for a smooth experience.
Integrating DAS with Paid Lightning Lane Services
Many guests assume that having DAS makes the paid Lightning Lane services unnecessary. This is not always the case. DAS allows you to hold one return time at a time. If the park is crowded, the return time for a popular attraction might be several hours away. During that gap, you can use the Lightning Lane Multi Pass to access other rides. These two systems operate on separate tracks. You can hold a DAS return time for Slinky Dog Dash while simultaneously holding a Lightning Lane Multi Pass reservation for Toy Story Mania. This strategy effectively doubles your ability to avoid traditional standby lines.
The Lightning Lane Single Pass Strategy
For the most popular attractions like Seven Dwarfs Mine Train or Guardians of the Galaxy: Cosmic Rewind, Disney offers Lightning Lane Single Pass purchases. DAS users can still use their service for these rides, but purchasing a Single Pass can be a tactical choice. If you buy a Single Pass, you save your one DAS slot for a different high-demand ride. This is particularly helpful on days when you want to experience every major attraction without waiting for long DAS return windows to clear. You should check the official DAS page for the most current list of attractions that offer these options.
Navigating Virtual Queues with DAS
Virtual Queues are required for specific high-demand attractions such as TRON Lightcycle / Run. These do not have a standby line. To ride, you must join the Virtual Queue through the My Disney Experience app at 7 AM or 1 PM. Having DAS does not grant you automatic entry into a Virtual Queue; you must successfully secure a boarding group just like every other guest. Once your boarding group is called, proceed to the attraction entrance and speak with the Cast Member at the Lightning Lane scanner. They will verify your DAS status and your boarding group, typically allowing you to enter through the Lightning Lane rather than the standard Virtual Queue line. This is a vital distinction because the standard Virtual Queue can still involve a significant wait in a physical line once your group is called.
Coordination and Timing Tactics
Timing is the biggest challenge when mixing these systems. Since you can only have one active DAS return time, you must prioritize rides with the longest standby waits for your DAS selections. Use the paid Multi Pass for rides with shorter Lightning Lane availability. If a DAS return time overlaps with a Virtual Queue window or a paid Lightning Lane window, do not panic. DAS return times do not expire until the park closes. You can fulfill your paid or Virtual Queue commitments first. If you find yourself physically unable to make a window due to the nature of your disability, look for a Cast Member at a Guest Experience Team umbrella (blue umbrellas) for assistance with adjusting windows.
| Service Type | Cost | Interaction with DAS |
|---|---|---|
| Lightning Lane Multi Pass | Paid Daily | Can be used at the same time as DAS |
| Lightning Lane Single Pass | Paid per Ride | Useful for saving DAS slots for other rides |
| Virtual Queue | Free | Must join VQ first, then use DAS at entry |
| Rider Switch | Free | Can be combined for groups with non-riding members |
Practical Planning for 2025 Visits
Pre-Arrival Registration
You should take advantage of the virtual registration window which opens 60 days before your visit. This allows you to set up your DAS status before you ever step foot in a park. During this call, you can ask the Cast Member about specific ride interactions. They can provide clarity on which rides currently require Virtual Queues and how the DAS redemption works for the newest attractions. Because policies can change quickly, confirming attraction-specific rules on the official Disney site right before your trip is a necessary step. The 2025 updates have made the screening process more thorough. Being prepared to explain your specific needs during the video call will help ensure you get the right level of assistance.
Managing the App
The My Disney Experience app is the central hub for all these services. You will see your DAS return times, your Lightning Lane selections, and your Virtual Queue status all in one place. It is helpful to designate one person in your party to manage the digital side of the trip. This person can keep track of when the next DAS return time can be booked. Remember that you can book your next DAS return time as soon as you have scanned into your current one. This “rolling” booking system is the key to maximizing your day. If the app glitches or shows conflicting information, the Guest Experience Team is your best resource for a quick fix without needing to trek back to the front of the park.
Ride transfer rules and mobility device accessibility by attraction
The physical mechanics of boarding a ride are just as vital as securing a DAS return time. While the digital side of the Disability Access Service handles the wait, the transfer rules determine if you can actually experience the attraction. Disney World categorizes rides based on how you interact with the vehicle. Some allow you to stay in your device, while others require a full transfer. Understanding these distinctions helps avoid frustration at the boarding gate.
Categories of Attraction Access
Rides for Staying in a Wheelchair or ECV
A small number of attractions allow you to remain in your mobility device for the entire experience. These typically involve boats or large ride vehicles with ramps. In Magic Kingdom, the Jungle Cruise and It’s a Small World have specific boats with a level platform and tie-down points. At Animal Kingdom, Kilimanjaro Safaris features a truck with a ramp and a dedicated space for one wheelchair. EPCOT offers Frozen Ever After and the Gran Fiesta Tour with similar accessible boats. Note that most of these vehicles have a width limit of 26 inches. If your power chair or manual chair is wider, you might not fit. ECVs are often too heavy or bulky for these specific spots, so you may be asked to switch to a manual wheelchair provided by Disney at the entrance.
Rides Requiring a Transfer to a Manual Wheelchair
Some attractions allow you to stay in a wheelchair through the queue but not an ECV. Toy Story Mania at Hollywood Studios and Buzz Lightyear’s Space Ranger Spin at Magic Kingdom are prime examples. You can ride in a manual wheelchair, but the ride vehicle cannot accommodate the footprint of an ECV. In these cases, you park your ECV at the attraction entrance and use a Disney-provided manual chair to navigate the line and board the ride. This is a common middle ground for those who can sit in a standard seat but cannot walk long distances.
Rides Requiring a Full Transfer to the Ride Seat
The majority of thrill rides and high-speed attractions require a full transfer from your device to the ride seat. This includes Space Mountain, Big Thunder Mountain Railroad, and Slinky Dog Dash. For these, you must be able to move yourself or have a companion assist you into the vehicle. Cast Members are generally not permitted to lift guests due to safety and liability rules. They can steady the vehicle or hold a transfer board, but the physical move is up to you and your party. In Magic Kingdom, about 70 percent of rides fall into this category. You should check the Accessibility Services for Guests with Disabilities – Disney World page for the most current list of transfer requirements.
Technical Specifications and Boarding Procedures
Mobility Device Dimensions
Standard accessible ride vehicles are designed with specific footprints in mind. A manual wheelchair width of 26 inches or less is the safest bet for fitting onto ramps and into designated spots. For ECVs, a footprint of 25 by 45 inches is the common maximum for stowage near the boarding area. If your device exceeds these measurements, you may face challenges in certain queues or boarding zones. Power chairs with heavy batteries can weigh up to 600 pounds, which is usually the limit for the lifts used on buses and some ride platforms.
Securement and Stowage
When you remain in a wheelchair on a ride, Cast Members use a four-point tie-down system to secure the frame to the floor. This process takes a few minutes and ensures the chair does not shift during the movement of the attraction. If you transfer out of your chair, it will be parked in a designated area near the exit. On some rides, like the Haunted Mansion, the chair is moved from the boarding area to the exit area by staff so it is waiting for you when you get off. For rides with a single boarding and exit point, your chair stays right where you left it.
Companion Seating
Accessible ride vehicles usually have space for one guest in a wheelchair and one or two companions in the same row. Larger parties might be split across multiple vehicles or rows. It is helpful to decide who will sit with the guest using the accessible spot before reaching the front of the line to keep the boarding process smooth.
Adaptive Equipment and Assistance Techniques
Transfer Boards and Slings
If you have limited lower body mobility, a transfer board can be a lifesaver. These are typically 18 to 24 inches long and bridge the gap between your wheelchair and the ride seat. While Disney does not provide these at every ride, you are encouraged to bring your own. Some guests use slings for high-pivot transfers, but remember that your caregiver must perform the lift. Cast Members can provide a steadying hand on the ride vehicle to prevent it from rocking while you move.
Cast Member Support
Cast Members are trained to explain the boarding process in detail. They can tell you exactly where the grab bars are located and how the seat is shaped. If a ride has a moving walkway, like Peter Pan’s Flight or The Seas with Nemo & Friends, they can often slow down or stop the belt to give you more time to transfer safely. Always communicate your needs clearly as you approach the boarding area.
Park-Specific Accessibility Highlights
| Park | Attraction | Access Type |
|---|---|---|
| Magic Kingdom | Jungle Cruise | Stay in Wheelchair |
| Magic Kingdom | Space Mountain | Must Transfer |
| EPCOT | Remy’s Ratatouille Adventure | Transfer or Accessible Vehicle |
| Hollywood Studios | Toy Story Mania | Transfer to Manual Chair |
| Animal Kingdom | Kilimanjaro Safaris | Stay in Wheelchair |
Previsit planning packing and in-park strategies for wheelchair users
Planning for a trip to Walt Disney World requires a different level of detail when you are navigating with a wheelchair or an ECV. The timeline starts exactly 60 days before your first park day. This is the earliest you can register for the Disability Access Service (DAS). You must complete this process through a virtual video call with a Cast Member. In-person registration at Guest Relations is no longer available. The person requesting the service must be present on the call. During this screening, a medical professional may be involved to assess eligibility. If approved, the pass is now valid for up to one year or the length of your ticket.
Resort and Dining Logistics
Accessible Accommodations
Booking the right room is the foundation of a comfortable stay. Disney resorts offer several types of accessible rooms. You can choose rooms with roll-in showers or those designed for hearing accessibility. Doorways are typically 36 inches wide to accommodate standard chairs. It is best to call Disney Accessibility Services at least 60 days ahead to confirm specific needs like bed height or proximity to elevators. Only about 5 percent of resort rooms are fully accessible, so early booking is essential.
Dining Reservations
When you make dining reservations through the My Disney Experience app, always add a note about the wheelchair. This helps the restaurant assign a table with enough clearance for the device. Some older restaurants have tighter layouts. Mentioning the chair size ensures you are not placed in a high-traffic corner. If you use a large power chair, arriving 10 minutes early allows the host to check the path of travel to your table.
Mobility Rentals
If you do not bring your own equipment, you can rent at the park entrances. Manual wheelchairs cost around 15 to 25 dollars daily. ECVs are more expensive, usually ranging from 50 to 70 dollars per day. Off-site companies like Cloud of Goods often provide better rates and deliver directly to your hotel. These third-party rentals are often more comfortable for long days because they offer better suspension and battery life than the standard park models.
Packing and Device Preparation
Essential Gear
Florida weather is unpredictable. Pack a heavy-duty waterproof cover for your wheelchair or ECV electronics. A simple poncho often leaves the joystick or battery housing exposed to rain. Bring a small tool kit with Allen wrenches plus a tire pump for manual chairs. If you use an ECV, carry two spare batteries if possible. While parks have charging stations near exits, they can take 4 to 8 hours for a full charge. Having your own power backup prevents being stranded.
Comfort and Health
Pressure relief cushions are vital for long days on pavement. Plan to shift positions or perform pressure releases every two hours to protect skin integrity. Carry a copy of your medical documentation. While Disney does not require a doctor’s note for DAS, having a summary of your needs helps you explain your situation clearly during the virtual call. Also, keep a list of medications and emergency contacts in a waterproof pouch attached to the chair.
In-Park Navigation Strategies
Accessible Parking and Arrival
Every park lot has designated accessible parking near the entrance. You must have a valid disability placard. At Magic Kingdom, these spots are at the Transportation and Ticket Center. You will then take the monorail or ferry to the gate. At Animal Kingdom, the Lily Lot is the closest area. If the accessible lot is full, ask a Cast Member for the closest available spot. They can often provide a priority spot in the standard lot.
Managing Crowds and Parades
Navigating through thick crowds during parades or fireworks is challenging. Use a stroller or a companion to walk slightly ahead of the wheelchair to act as a buffer. Disney provides designated accessible viewing areas for parades. These spots have a 36-inch clearance but fill up quickly. Arrive at least 45 minutes early for these locations. If you need to manage medical needs like catheterization or medication in private, head to the Baby Care Centers. These centers are open from 8 AM to 7 PM and offer large, clean changing areas for adults.
Using Rider Switch
Rider Switch is a helpful tool that works alongside DAS. If a member of your party wants to experience a ride that you cannot board, one person stays with you while the others ride. Then, the waiting person can board without standing in the full line. This ensures no one misses out on the experience. Communicate with the Cast Member at the attraction entrance to set this up. They will scan your MagicBand to link the return window.
Choosing the Right Wheelchair
Selecting a chair for a Disney trip involves balancing size and maneuverability. A chair with a width of 26 inches or less fits most accessible ride vehicles. The Quickie 2 Lite is a popular travel model because it weighs only 34 pounds and folds easily for bus transport. For those needing more support, the Karman XO-505 offers better comfort for 12-hour days. Check with your insurance provider before the trip. Medicare Part B sometimes covers up to 80 percent of rental or purchase costs if you have a prescription for a mobility device. For more official resources, visit the Accessibility Services for Guests with Disabilities page to review the latest 2025 updates.
| Service Type | Cost Estimate | Key Strategy |
|---|---|---|
| DAS Pass | Free | Register virtually 60 days out |
| Manual Wheelchair | $15 – $25 daily | Bring a pressure relief cushion |
| ECV Rental | $50 – $70 daily | Charge fully every night |
| Accessible Parking | Standard Rate | Display valid placard clearly |
Frequently Asked Questions common concerns answered
Who qualifies for the Disability Access Service (DAS)?
The service is intended for guests who have a developmental disability such as autism. It is specifically for those who cannot tolerate waiting in a traditional standby queue for an extended period. Disney updated the eligibility language in January 2025 to remove restrictive wording. If your primary challenge is mobility or the inability to stand for long periods, Disney usually suggests using a wheelchair or ECV instead of DAS. You can check the latest eligibility details on the official DAS page.
Can I pre-register for DAS before I arrive?
Yes. You can register through a virtual video call as early as 60 days before your visit. You must do this at least 2 days before you arrive. The person requesting the pass must be present on the call. This includes minors. In-person registration at Guest Relations is no longer an option. During the call, a medical professional may assist with the assessment. This process usually takes about 30 to 45 minutes. You can find more about the new rules for the eligibility call online.
What if my party does not all need DAS?
Only one person in the group needs to be registered for DAS. However, the registered guest must be present when the return time is obtained. They must also be present when the group enters the attraction. The party size is typically limited to the DAS holder plus three companions. Caregivers are included in this count. If you have a larger immediate family, speak with the Cast Member during your registration call.
How many return windows can I hold at once?
You can only hold one DAS return time at a time. Once you redeem your current return time or the attraction closes, you can book another one. These times are comparable to the current standby wait. They do not provide immediate access. You wait the same amount of time as others, but you do it outside the physical line. This allows you to find a quiet area or use a restroom if needed.
Can I use Lightning Lane Multi Pass with DAS?
Yes. You can purchase Lightning Lane Multi Pass or Lightning Lane Single Pass while using DAS. These services stack. This is a helpful strategy for crowded days. You can hold a DAS return time for one ride and a Lightning Lane for another. This helps minimize the total time spent in the park. It is especially useful during peak holiday seasons when wait times are very high.
What if a Cast Member says I cannot board for safety reasons?
Safety is the priority for Disney. If a Cast Member determines that a transfer is unsafe or a guest cannot meet the boarding requirements, they may deny access. If you feel this is an error, ask to speak with a Guest Relations supervisor or an ADA coordinator. You can also call the Disney accessibility line at 407-560-2547. It is helpful to document the time and location of the incident if you plan to file a formal complaint later.
What documentation should I bring for DAS?
Disney does not require a doctor’s note or formal medical records for DAS registration. They focus on the conversation about your specific needs. You should be prepared to explain why you cannot wait in a standard line. Mentioning specific triggers or needs is more effective than just stating a diagnosis. While a note is not required, some guests find it helpful to have one as a personal reference during the video call. Be honest, as false statements can lead to a permanent ban from all Disney parks.
How do service animals fit into the process?
Service animals are welcome at Walt Disney World. They do not require a DAS pass to enter queues. However, they cannot go on many thrill rides for safety reasons. Disney provides portable kennels at some attractions. You can also use Rider Switch if one person in your party stays behind with the animal. Relief areas are located throughout the parks. You can find them on the park maps or by asking a Cast Member.
Are there tips for crowded holidays?
Holidays are very busy. You should arrive before the park opens. Use your first DAS return time immediately. Since you can only hold one at a time, booking early and often is the best way to see more attractions. Use the My Disney Experience app to monitor wait times. If a ride has a short standby line, you might choose to wait normally and save your DAS for a high-demand attraction. For more details on recent changes, read about every new rule added to DAS in 2025.
Final takeaway actionable checklist and resources
Planning a trip to Disney World with a disability requires more than just booking a hotel. You need a solid strategy to handle the logistics of the parks. The system changed several times throughout 2025. Staying updated is the only way to avoid frustration at the gate. This guide provides the final steps you need to take before you leave for Orlando.
Prioritized Next Steps
Your first priority is the virtual registration for the Disability Access Service. You can do this as early as 60 days before your first park day. Disney no longer allows in-person registration at Guest Relations. You must log into your Disney account and join a video chat with a Cast Member. The person who needs the pass must be on the call. This includes children. Be ready to explain why waiting in a standard line is not possible due to a developmental disability. In early 2025, Disney removed the word “only” from their eligibility language. This change suggests a slightly broader consideration for those with developmental needs. However, the focus remains on those who cannot tolerate traditional queues.
Confirming Attraction Accessibility
Once you have your DAS sorted, look at the specific rides you want to experience. Not every ride allows you to stay in your wheelchair. In fact, over 70 percent of rides at Magic Kingdom require a transfer. You should check the official Accessibility Services for Guests with Disabilities – Disney World page for a full list of requirements. If you use a power chair, you will almost certainly need to transfer to a manual wheelchair or the ride vehicle itself. Measure your chair before you go. Most accessible ride vehicles accommodate widths up to 26 inches. If your chair is wider, you might face limitations.
Making Reservations
Link your DAS to your MagicBand or ticket immediately after your video call. If you are traveling with a group, ensure everyone is linked in your Friends and Family list. A DAS holder can typically bring up to three companions. If you have a larger immediate family, discuss this during your registration call. When booking dining, use the special requests section to mention your wheelchair. This helps the restaurant seat you at a table with enough space for your mobility device.
Packing Mobility Essentials
Florida weather is unpredictable. Pack a waterproof cover for your wheelchair or ECV. If your electronics get wet, your trip could end early. Bring a small tool kit with Allen wrenches and a spare inner tube if you use a manual chair. For power chair users, bring your charger and a heavy duty extension cord. Disney parks have charging stations, but they are often tucked away. You should also pack a pressure relief cushion. You will spend more time in your chair than usual. Skin integrity is a major concern during long park days.
Actionable Pre-Visit Checklist
- Complete the virtual DAS interview between 2 and 60 days before arrival.
- Verify that all members of your party appear in your Disney app.
- Download the latest park maps that highlight companion restrooms.
- Confirm your resort room has the specific features you need, such as a roll-in shower.
- Check the battery health of your ECV or power chair.
- Print a physical copy of your emergency contact info and equipment specs.
Safety and Rights Reminder
The Americans with Disabilities Act requires Disney to provide reasonable accommodations. This does not guarantee a specific service like DAS, but it does mean they must offer an alternative if you have a documented need. If a Cast Member tells you that you cannot board for a safety reason, stay calm. Ask for a clear explanation of the safety requirement. If you feel you are being denied access unfairly, ask to speak with an ADA coordinator or a Guest Relations supervisor. You can also contact the Disney accessibility team at 407-560-2547. Document the time, the location, and the names of the staff involved.
Curated Resources
For the most current rules, always start with the official Disability Access Service (DAS) | Walt Disney World Resort page. To keep track of the frequent policy shifts, sites like the Disney Food Blog provide updates on Every New Rule Added to Disability Access Service at Disney World. If you need to rent a chair, companies like Cloud of Goods or ScooterBug are popular choices. For advocacy and legal rights, Disability Rights Florida is a valuable resource for visitors.
On-Park Behaviors for Success
Clear communication with Cast Members makes everything easier. When you arrive at a ride, tell the greeter if you can transfer or if you need to stay in your chair. Be mindful of your return windows. You can only hold one DAS return time at once. Use that time to rest, eat, or visit a low-wait attraction. If you encounter an issue with a ride vehicle, report it to Guest Relations before you leave the park. Your feedback helps Disney improve their systems. Policies change fast. Check the official app every morning for any last-minute updates to park hours or accessibility services. Sharing your own experience on forums or review sites helps the next person navigate the parks with more confidence.
References
- Every New Rule Added to Disability Access Service at Disney World … — Over the course of 2025, we've seen SIX updates to the DAS system, which may be confusing for those who need it. So let's dig into every new …
- Disney World Adds New Rules for DAS Eligibility Call — With the extension of DAS applications to 60 days, guests are able to make an informed decision about their status and cancel if they're denied …
- Disney World Quietly Updates Disability Access Service (DAS) Rules — To register for DAS, you can speak with a Cast Member online as early as 60 days before your park visit. Keep in mind that the person the pass …
- Disney Responds to DAS Disability Pass Change Proposal from … — One of the most widely discussed early-2025 changes was the removal of the word “only” from the phrasing that DAS is available to guests with “ …
- Disability Access Service (DAS) | Walt Disney World Resort — The Guest requesting DAS either for themself or for someone else (e.g. a minor child) must be 18 years of age or older to register; The Guest for whom DAS is …
- Accessibility Services for Guests with Disabilities – Disney World — Explore services for Guests with disabilities, including pre-arrival resources, downloadable guides and services available while visiting Walt Disney World …
EMPTY